


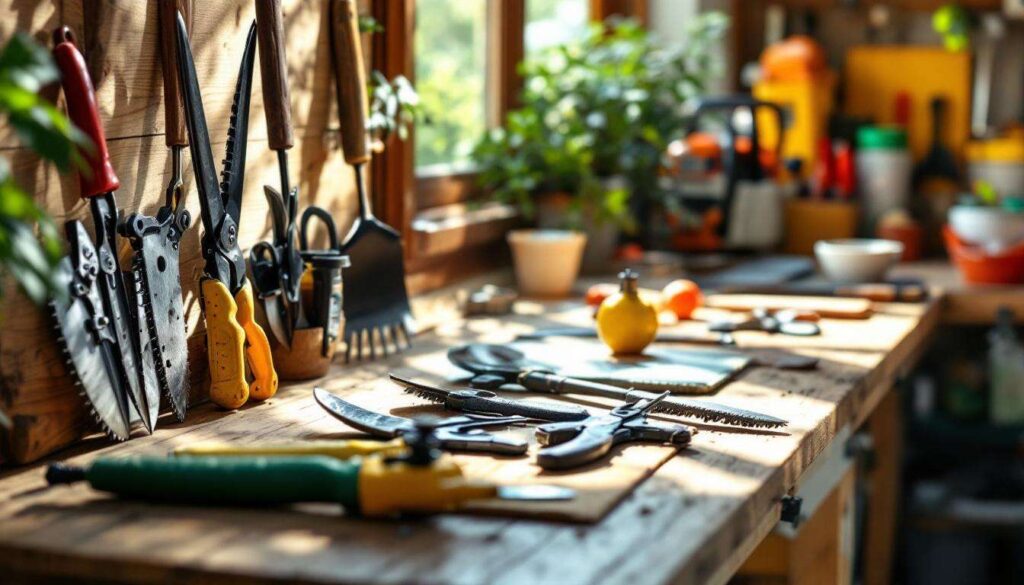
As winter fades and temperatures begin to rise, gardeners everywhere feel the familiar pull toward their yards and gardens. Before diving into planting and pruning tasks, however, taking time to prepare your essential cutting tools can make the difference between a frustrating season and a productive one. Sharp, clean equipment not only makes work easier but also promotes healthier plants by creating clean cuts that heal quickly. Neglected tools, on the other hand, can damage plant tissue, spread disease, and turn simple tasks into exhausting ordeals. Investing a few hours in tool maintenance now will pay dividends throughout the growing season.
Importance of maintaining gardening tools for spring
Health benefits for your plants
Properly maintained cutting tools directly impact plant health in ways many gardeners overlook. Sharp blades create clean cuts that allow plants to heal rapidly, minimizing stress and reducing entry points for pathogens. Dull blades, by contrast, crush and tear plant tissue, leaving ragged wounds that take longer to heal and become vulnerable to bacterial and fungal infections. When you use clean, sharp tools, you’re essentially performing surgical procedures on your plants rather than inflicting traumatic injuries.
Efficiency and safety considerations
Beyond plant health, well-maintained tools make gardening work safer and more efficient. Attempting to cut through branches with dull blades requires excessive force, increasing the risk of the tool slipping and causing injury. Sharp tools require less physical effort, reducing fatigue during extended pruning sessions and allowing you to accomplish more in less time. Clean equipment also prevents the spread of diseases between plants, protecting your entire garden from contamination.
Economic advantages of regular maintenance
Quality gardening tools represent a significant investment, and proper maintenance extends their useful life considerably. Regular cleaning prevents rust and corrosion, while sharpening prevents the need for premature replacement. Consider these financial benefits:
- Professional sharpening services typically cost between $5 and $15 per tool
- Replacement pruners range from $30 to $100 or more for professional-grade models
- Quality loppers can cost between $50 and $150
- Chainsaws represent investments of $200 to $600 for homeowner models
Understanding these maintenance principles naturally leads to recognizing when your tools actually need attention rather than following arbitrary schedules.
How to identify the right time to sharpen your tools
Visual inspection techniques
Before the spring rush begins, examine each cutting tool carefully under good lighting. Look for visible nicks, chips, or irregularities along the cutting edge that indicate damage requiring attention. Hold the blade up to the light at various angles to spot dull sections where the edge appears rounded rather than crisp. A sharp blade reflects light as a thin, consistent line, while a dull blade shows a wider, irregular reflection.
Performance-based indicators
The most reliable way to assess sharpness involves testing the tool on actual plant material. Try these practical assessments:
- Paper test: a sharp blade should slice through paper cleanly without tearing
- Branch test: cuts should be clean and require minimal pressure
- Crushing indicator: if the tool crushes stems rather than cutting them, sharpening is overdue
- Effort required: needing excessive force signals dull blades
Seasonal maintenance schedule
While condition-based maintenance proves most effective, establishing a baseline schedule ensures tools never deteriorate too far. Most gardeners benefit from sharpening pruners and loppers at the beginning and end of each growing season, with additional touch-ups for heavily used tools. Chainsaws typically require more frequent attention, potentially after every few hours of use depending on cutting conditions.
Once you’ve determined your tools need sharpening, understanding the proper techniques ensures optimal results without damaging the equipment.
Techniques to effectively sharpen pruners and loppers
Essential sharpening tools and materials
Gathering the right supplies before beginning makes the sharpening process more efficient and produces better results. Basic sharpening requires relatively few specialized tools, most of which serve multiple purposes in the workshop. Essential items include:
- Mill bastard file or diamond file for initial sharpening
- Sharpening stone with medium and fine grits
- Honing oil or water for lubricating stones
- Wire brush for removing debris
- Clean rags for wiping blades
- Safety gloves to protect hands
Step-by-step sharpening process
Begin by cleaning the blades thoroughly to remove sap, dirt, and rust that could interfere with sharpening. Disassemble the tool if possible to access the blade more easily and prevent damage to other components. Most pruners and loppers feature a single beveled edge that requires sharpening, while the flat back side should remain smooth.
Position the file or stone at the same angle as the existing bevel, typically between 10 and 20 degrees. Push the file away from your body along the entire length of the blade in smooth, consistent strokes. Repeat this motion 10 to 15 times, applying moderate pressure. Check your progress frequently to ensure you’re maintaining the correct angle and removing material evenly.
Finishing and testing
After establishing a sharp edge with the file, refine it using a sharpening stone with progressively finer grits. This polishing step removes microscopic burrs and creates a razor-sharp edge. Test the sharpness using the paper test mentioned earlier, then reassemble the tool and verify proper operation before storing it.
While pruners and loppers follow similar sharpening principles, chainsaws require different techniques and additional maintenance steps to ensure safe, efficient operation.
Steps to clean and maintain a chainsaw
Safety precautions before maintenance
Chainsaw maintenance demands strict adherence to safety protocols due to the tool’s inherent dangers. Always disconnect the spark plug before performing any maintenance to prevent accidental starting. Wear heavy-duty gloves to protect against sharp chain teeth, and work in a well-ventilated area when dealing with fuel and oil. Allow the engine to cool completely if the saw was recently used.
Cleaning the chainsaw components
Thorough cleaning removes accumulated sawdust, oil residue, and debris that impair performance and accelerate wear. Focus on these critical areas:
| Component | Cleaning Method | Frequency |
|---|---|---|
| Air filter | Remove and tap out debris or wash with soapy water | After every use |
| Chain and bar | Brush away sawdust, clean oil passages | After every use |
| Cooling fins | Remove packed debris with brush or compressed air | Every 5 hours of use |
| Spark arrestor | Remove carbon buildup with wire brush | Every 25 hours of use |
Chain sharpening procedures
Chainsaw chains require specialized sharpening techniques using round files matched to the chain’s pitch. Each tooth must be filed to the same length and angle to ensure balanced cutting. Many homeowners prefer using electric chain sharpeners or professional sharpening services for consistent results, though manual filing remains viable with practice.
Bar maintenance and chain tension
The guide bar requires regular attention to prevent uneven wear. Flip the bar periodically to distribute wear evenly, and clean the groove where the chain rides using a specialized cleaning tool. Check chain tension before each use, adjusting it so the chain fits snugly against the bar but can still be pulled freely by hand. A properly tensioned chain reduces wear and improves cutting performance.
Understanding these maintenance procedures provides the foundation for implementing practices that maximize tool longevity beyond basic cleaning and sharpening.
Tips to extend the lifespan of your tools
Proper storage practices
How you store tools between uses significantly impacts their condition and longevity. Keep cutting tools in a dry environment to prevent rust formation, ideally hanging them or storing them in tool rolls rather than tossing them loose in a bucket. Apply a light coating of oil to metal surfaces before extended storage periods. For chainsaws, drain fuel if storing for more than 30 days and remove the chain for separate storage in an oil bath.
Usage best practices
Using tools correctly prevents unnecessary wear and damage. Never force a tool beyond its designed capacity or use pruners on branches better suited for loppers or saws. Match the tool to the task and respect cutting diameter recommendations provided by manufacturers. Clean tools immediately after use rather than allowing sap and debris to harden on blades.
Regular inspection routines
Implementing brief inspection routines helps catch problems before they become serious. Check these elements regularly:
- Blade tightness and alignment on pruners and loppers
- Handle integrity and grip condition
- Spring tension and mechanism function
- Locking mechanisms and safety features
- Fuel lines and filters on power equipment
These preventive measures work in concert with pre-season preparation to ensure your tools perform optimally when gardening activity intensifies.
Preparing tools for a successful gardening season
Creating a pre-season checklist
Systematic preparation prevents overlooked maintenance tasks and ensures readiness when spring arrives. Develop a comprehensive checklist covering all cutting tools, including items you may not use frequently. Schedule maintenance during late winter when weather may limit outdoor activities but before the spring workload begins. This timing provides adequate opportunity to address any issues requiring parts or professional service.
Organizing your tool collection
A well-organized tool storage system makes maintenance easier and helps preserve tool condition. Group tools by type and frequency of use, keeping frequently needed items most accessible. Label storage locations and maintain an inventory of tools, replacement parts, and maintenance supplies. This organization streamlines both regular maintenance and mid-season touch-ups.
Stocking maintenance supplies
Having necessary supplies on hand eliminates delays when maintenance needs arise. Maintain adequate stocks of sharpening files, lubricating oils, cleaning solvents, and replacement parts for your specific tools. For chainsaws, keep extra chains, spark plugs, air filters, and appropriate fuel and bar oil. This preparedness allows you to address maintenance needs promptly rather than postponing tasks due to missing supplies.
Sharp, clean garden tools transform spring gardening from a struggle into an enjoyable, productive experience. The time invested in proper maintenance pays immediate dividends through easier cutting, healthier plants, and safer operation. By establishing regular inspection and maintenance routines, you protect your tool investment while ensuring readiness for whatever the growing season demands. Well-maintained equipment responds precisely to your intentions, allowing you to focus on the creative and nurturing aspects of gardening rather than fighting with inadequate tools. As buds begin to swell and growth resumes, your prepared tools will be ready to help shape and guide your garden toward another successful season.