


Growing potatoes successfully requires careful timing and proper technique to ensure a bountiful harvest. The difference between a thriving potato crop and a disappointing yield often comes down to understanding when soil conditions are optimal and how to properly prepare both the ground and the seed potatoes themselves. Whether you’re a seasoned gardener or attempting your first potato patch, mastering the fundamentals of planting after the final spring frost will set the foundation for months of productive growth ahead.
Introduction to Potato Planting in 2026
Why timing matters for potato cultivation
Potatoes are cool-season crops that thrive when planted at precisely the right moment in spring. The timing of planting directly influences tuber development, disease resistance, and overall yield. Planting too early exposes tender shoots to frost damage, while delaying too long reduces the growing season and can result in smaller harvests.
The agricultural calendar for 2026 follows familiar seasonal patterns, with regional variations determining the optimal planting windows across different growing zones. Understanding your specific climate zone remains essential for success.
Regional considerations for 2026 planting
Different geographic areas experience their last frost dates at varying times throughout spring. Northern regions typically see safe planting conditions from late April through May, while southern zones may begin as early as February or March.
| Growing Zone | Typical Last Frost | Planting Window |
|---|---|---|
| Zones 3-4 | Mid to late May | Late May to early June |
| Zones 5-6 | Mid April to early May | Late April to mid May |
| Zones 7-8 | Early to mid April | Mid March to early April |
| Zones 9-10 | Late February to March | February to early March |
These guidelines provide a framework, but local microclimates can shift dates by several weeks. With this foundation established, determining your specific last frost date becomes the next critical step.
Understanding the Last Frost Date
Defining the last frost date
The last frost date represents the average date after which a killing frost is unlikely to occur in your area. This statistical measure is based on historical weather data spanning decades and indicates when soil and air temperatures stabilize sufficiently for tender plants to survive outdoors.
It’s important to note that this date is a probability, not a guarantee. Most last frost dates reflect a 50 percent chance that frost won’t occur after that point, though some sources use 90 percent probability thresholds for more conservative estimates.
How to find your local last frost date
Several reliable resources help gardeners pinpoint their specific last frost date:
- The National Weather Service maintains historical climate data for thousands of locations
- University extension offices provide region-specific agricultural calendars
- Online gardening calculators allow zip code searches for localized frost dates
- Local nurseries and experienced gardeners offer practical knowledge of microclimates
Adjusting for potato frost tolerance
Unlike many vegetables, potato plants can tolerate light frosts once established, though the tubers themselves are damaged by freezing soil. This moderate cold tolerance means you can plant seed potatoes approximately two weeks before the last expected frost date, allowing shoots to emerge as conditions warm.
The key factor is soil temperature rather than air temperature. Potatoes need soil temperatures of at least 45°F to sprout, with optimal growth occurring between 60°F and 70°F. Once you’ve identified your frost timeline, preparing the planting site becomes paramount.
Preparing the Soil for Planting
Soil temperature and moisture requirements
Before any planting begins, verify that your soil has reached the minimum temperature threshold. A soil thermometer inserted four inches deep should read at least 45°F, though waiting until temperatures reach 50°F or higher produces better results.
Soil moisture also requires attention. The ground should be workable but not waterlogged. Squeezing a handful of soil should form a ball that crumbles when poked, indicating proper moisture balance. Planting in overly wet soil leads to seed potato rot and poor germination.
Soil composition and pH levels
Potatoes perform best in loose, well-draining soil with a slightly acidic pH between 5.0 and 6.5. Heavy clay soils benefit from amendments to improve drainage and prevent waterlogging:
- Incorporate compost or aged manure to increase organic matter content
- Add coarse sand or perlite to heavy soils for better drainage
- Mix in peat moss or sulfur to lower pH if soil tests reveal alkaline conditions
- Avoid fresh manure, which can promote scab disease on potato skins
Site selection and bed preparation
Choose a location that receives full sun for at least six to eight hours daily. Potatoes planted in shaded areas produce reduced yields and smaller tubers. The site should also have good air circulation to minimize fungal disease risks.
Prepare beds by loosening soil to a depth of 12 inches, removing rocks, weeds, and debris. Create rows or raised beds with adequate spacing for hilling later in the season. Proper soil preparation creates the ideal environment, but selecting quality seed potatoes is equally crucial.
Selecting and Preparing Seed Potatoes
Choosing certified seed potatoes
Always purchase certified seed potatoes from reputable suppliers rather than using grocery store potatoes. Certified seed potatoes are inspected for diseases and selected for optimal growing characteristics. Store-bought potatoes may carry diseases or have been treated with sprout inhibitors that prevent growth.
Popular varieties for different purposes include:
- Yukon Gold: all-purpose with buttery flavor and yellow flesh
- Russet Burbank: ideal for baking and frying with high starch content
- Red Pontiac: waxy texture perfect for boiling and salads
- Fingerling varieties: unique shapes with gourmet appeal
Cutting and curing seed potatoes
Seed potatoes larger than a chicken egg should be cut into pieces approximately two days before planting. Each piece must contain at least two eyes, the small indentations from which sprouts emerge. Pieces weighing 1.5 to 2 ounces provide sufficient energy for initial growth.
After cutting, allow pieces to cure in a cool, humid location at temperatures between 50°F and 65°F. This curing period enables cut surfaces to develop a protective layer that reduces rot risk when planted. Small seed potatoes under two ounces can be planted whole without cutting.
Pre-sprouting for earlier harvests
Pre-sprouting, or chitting, involves encouraging seed potatoes to develop short, sturdy sprouts before planting. Place seed potatoes in a bright location at room temperature for two to four weeks prior to planting. This technique advances harvest dates by one to two weeks and can increase overall yields.
With properly prepared seed potatoes ready, the actual planting process requires specific techniques to maximize success.
Planting Techniques After the Last Frost
Optimal planting depth and spacing
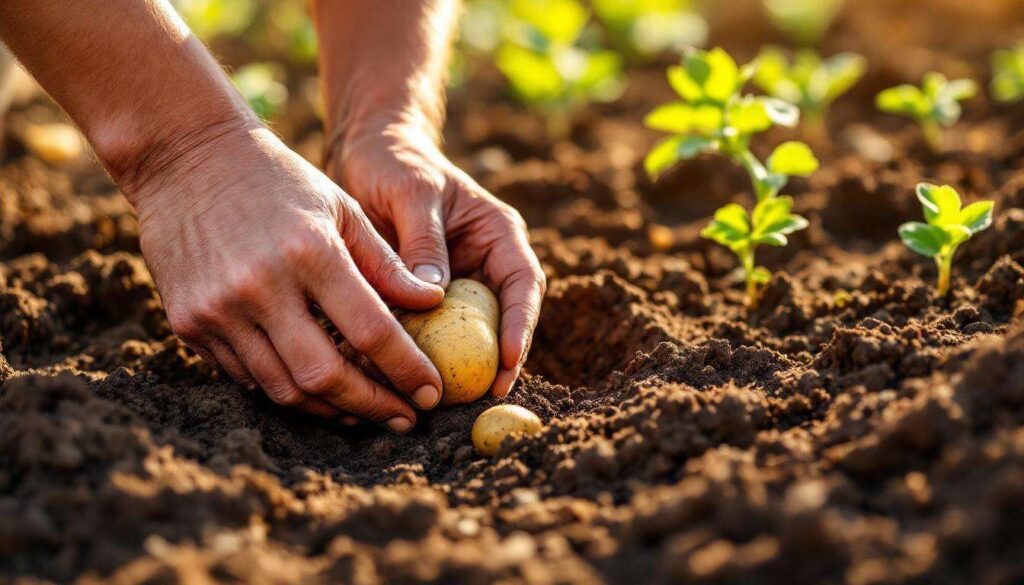
Plant seed potato pieces four inches deep with eyes facing upward. This depth provides sufficient soil coverage for tuber development while allowing shoots to reach the surface relatively quickly. Planting too shallow results in green, bitter potatoes exposed to sunlight, while excessive depth delays emergence and weakens plants.
Spacing recommendations vary by variety and growing method:
| Method | Between Plants | Between Rows |
|---|---|---|
| Traditional rows | 12 inches | 30-36 inches |
| Intensive beds | 10-12 inches | 24 inches |
| Container growing | 8-10 inches | N/A |
Hilling and mulching strategies
As potato plants grow, hilling becomes essential for maximizing tuber production. When plants reach six to eight inches tall, mound soil around the base, leaving only the top few inches of foliage exposed. Repeat this process two to three times throughout the growing season.
Hilling serves multiple purposes: it protects developing tubers from sunlight exposure, provides additional space for tuber formation, improves drainage, and helps control weeds. Alternatively, apply a thick layer of organic mulch such as straw to achieve similar benefits without repeated soil movement.
Watering immediately after planting
Water the planting area thoroughly after placing seed potatoes in the ground. This initial watering settles soil around the pieces and initiates the sprouting process. However, avoid overwatering during the first few weeks, as excessive moisture promotes rot before shoots establish.
Once plants emerge and begin active growth, consistent moisture becomes increasingly important for proper development.
Post-Planting Care Tips
Irrigation and moisture management
Potatoes require consistent moisture throughout the growing season, particularly during tuber formation. Provide one to two inches of water weekly through rainfall or irrigation. Irregular watering causes misshapen tubers, hollow centers, and growth cracks.
Monitor soil moisture by checking four to six inches below the surface. The soil should feel evenly moist but never waterlogged. Drip irrigation or soaker hoses deliver water efficiently while keeping foliage dry, reducing disease risks associated with overhead watering.
Fertilization schedule
Apply a balanced fertilizer at planting time, working it into the soil according to package directions. Potatoes benefit from additional side-dressing when plants reach six inches tall, using a fertilizer higher in phosphorus and potassium than nitrogen. Excessive nitrogen produces lush foliage at the expense of tuber development.
Pest and disease monitoring
Regular inspection helps catch problems early when they’re most manageable. Common potato pests and diseases include:
- Colorado potato beetles: hand-pick adults and larvae or use organic insecticides
- Aphids: spray with insecticidal soap or encourage beneficial insects
- Late blight: prevent with proper spacing, avoid overhead watering, apply fungicides if necessary
- Early blight: remove affected foliage and maintain plant vigor through proper nutrition
Crop rotation prevents soil-borne disease buildup. Avoid planting potatoes in the same location more than once every three to four years, and never follow potatoes with other nightshade family members like tomatoes or peppers.
Successfully growing potatoes hinges on understanding the relationship between frost dates and planting timing, preparing soil to optimal specifications, selecting quality seed potatoes, and implementing proper planting techniques. The weeks following the last frost provide the ideal window for establishing potato crops that will mature throughout summer. Attention to soil temperature, proper seed preparation including cutting and curing, and correct planting depth all contribute to vigorous plant establishment. Ongoing care through consistent watering, timely hilling, and vigilant pest monitoring ensures that initial planting efforts translate into abundant harvests of quality tubers for kitchen use and storage.