


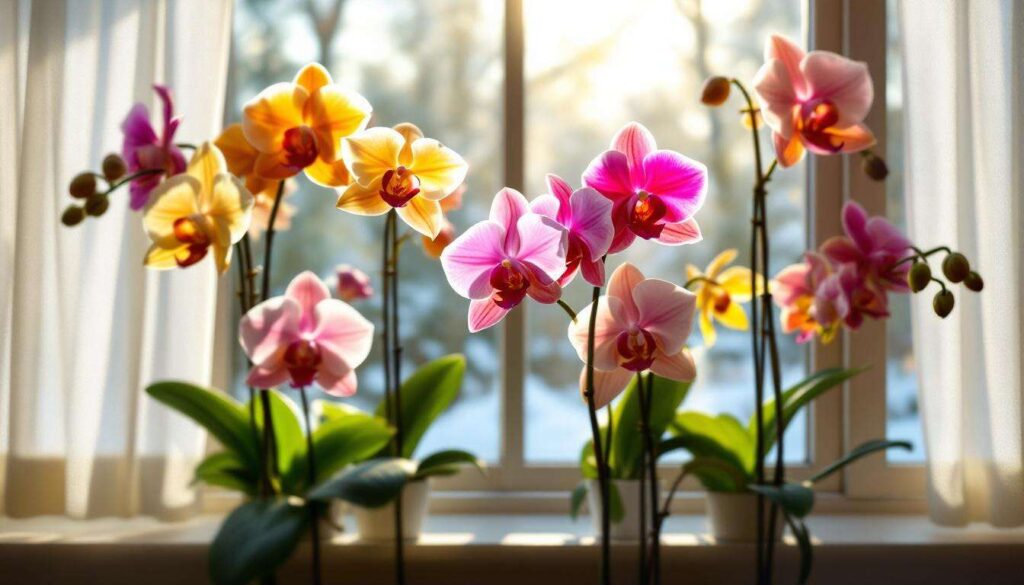
Orchids captivate gardeners with their elegant blooms and exotic appearance, yet many enthusiasts struggle to coax these tropical beauties into flowering during the colder months. The placement of orchids near windows during winter presents a critical challenge that often goes unnoticed until the damage is done. While natural light seems beneficial, the temperature fluctuations and environmental stresses near glass surfaces can sabotage blooming cycles entirely. Understanding the delicate balance between light exposure and environmental protection becomes essential for maintaining healthy orchids that reward caretakers with spectacular displays. The seemingly simple decision of where to position these plants can mean the difference between vibrant flowers and disappointing dormancy.
Understanding Orchid Needs in Winter
Temperature Requirements for Optimal Growth
Orchids demand consistent temperature ranges to initiate and maintain blooming cycles during winter. Most popular varieties thrive when daytime temperatures remain between 65°F and 75°F, with nighttime temperatures dropping by approximately 10 to 15 degrees. This temperature differential serves as a crucial trigger for flower spike development, yet the challenge lies in maintaining stability rather than experiencing wild fluctuations.
Windows create problematic microclimates during cold months. The glass surface becomes significantly cooler than the surrounding room, creating a cold zone that extends several inches inward. Orchids positioned too close to windows experience stress from these temperature drops, particularly during nighttime hours when outdoor temperatures plummet. This stress manifests in several ways:
- Bud blast, where developing flower buds yellow and drop prematurely
- Leaf damage appearing as dark spots or translucent patches
- Stunted root growth that compromises overall plant health
- Extended dormancy periods that delay or prevent blooming
Recognizing Signs of Temperature Stress
Vigilant observation helps identify temperature-related problems before they become irreversible. Healthy orchid leaves maintain firm texture and consistent coloration, while stressed plants display warning signals. Leaves developing a reddish or purplish tinge indicate exposure to excessive cold, while limp, accordion-pleated new growth suggests fluctuating conditions that disrupt cellular development.
| Symptom | Cause | Solution |
|---|---|---|
| Bud drop | Cold drafts | Move 3-4 feet from window |
| Leaf discoloration | Direct cold contact | Add insulation barrier |
| Slow growth | Low temperatures | Increase ambient warmth |
The relationship between light and temperature becomes particularly complex during winter, setting the stage for strategic placement decisions.
Natural Light: the Importance of Location
Balancing Light Exposure and Protection
Orchids require adequate light intensity to photosynthesize effectively and produce the energy reserves necessary for blooming. Different species demand varying light levels, with Phalaenopsis thriving in low to medium light while Cattleyas prefer brighter conditions. The winter sun, though weaker than summer rays, still provides valuable illumination when properly harnessed.
The challenge emerges when attempting to maximize light while minimizing cold exposure. South-facing windows offer the strongest winter light in the Northern Hemisphere, yet they also experience the greatest temperature differentials between day and night. East-facing windows provide gentler morning light with less dramatic temperature swings, making them often superior choices during cold months.
Measuring and Adjusting Light Levels
Successful orchid cultivation requires understanding actual light levels rather than relying on assumptions. Foot-candle measurements provide objective data, with most orchids requiring between 1,000 and 3,000 foot-candles depending on species. Simple light meter applications for smartphones offer convenient monitoring tools.
Strategic positioning achieves optimal results through careful distance management:
- Place orchids 2 to 4 feet back from south-facing windows
- Position directly in east or west windows with sheer curtain protection
- Supplement north-facing exposure with artificial grow lights
- Rotate plants weekly to ensure even light distribution
These placement strategies directly connect to the most common errors that sabotage winter blooming success.
Common Mistakes to Avoid Near Windows
The Direct Contact Problem
The single most damaging error involves allowing orchid leaves to touch cold window glass. Contact with freezing surfaces causes immediate cellular damage that appears as dark, water-soaked lesions. These injuries create entry points for pathogens and permanently scar foliage, reducing the plant’s photosynthetic capacity and aesthetic appeal.
Draft exposure represents another critical mistake. Windows, even modern double-paned versions, allow cold air infiltration around frames and seals. This continuous cold airflow creates conditions far more stressful than stable cool temperatures. Orchids subjected to drafts exhibit chronic stress responses that prevent blooming entirely.
Overcorrection and Overprotection
Some growers, recognizing cold dangers, make the opposite error by removing orchids from windows completely. Insufficient light during winter months causes etiolation, where plants produce weak, elongated growth in search of illumination. These compromised plants lack the vigor to produce flowers and become susceptible to disease.
| Mistake | Impact on Blooming | Prevention Method |
|---|---|---|
| Glass contact | Tissue damage, bud abortion | Maintain 6-inch minimum distance |
| Draft exposure | Chronic stress, no spike formation | Seal gaps, use draft guards |
| Insufficient light | Weak growth, no flowering | Supplement with grow lights |
| Inconsistent placement | Confused blooming cycle | Establish permanent location |
Environmental factors extend beyond temperature and light to include the often-overlooked element of moisture.
Adjusting Humidity for Healthy Orchids
Winter Humidity Challenges
Heating systems drastically reduce indoor humidity levels during cold months, often dropping below 30 percent when orchids prefer 50 to 70 percent relative humidity. This moisture deficit stresses plants in multiple ways, causing premature bud drop, stunted growth, and increased susceptibility to pests like spider mites that thrive in dry conditions.
Windows compound humidity problems through several mechanisms. The cold glass surface creates condensation that draws moisture from surrounding air, creating an even drier microclimate in the immediate vicinity. Additionally, heating vents often position near windows, directing hot, dry air directly across plants.
Practical Humidity Solutions
Maintaining adequate moisture levels requires creative approaches that work within typical home environments:
- Group orchids together to create a shared humid microclimate through collective transpiration
- Place plants on humidity trays filled with pebbles and water, ensuring pots sit above water level
- Run cool-mist humidifiers near orchid displays, maintaining 50 percent relative humidity
- Mist foliage in morning hours, allowing leaves to dry before nighttime temperature drops
- Install clear plastic barriers between plants and windows to reduce moisture loss
Proper nutrition works synergistically with environmental conditions to support blooming potential.
Winter Fertilization: best Practices and Tips
Adjusting Feeding Schedules
Orchid nutritional needs decrease during winter months as growth rates slow in response to reduced light and cooler temperatures. Continuing aggressive summer feeding schedules leads to salt accumulation in growing media, which damages roots and prevents nutrient uptake. The classic advice to “fertilize weakly, weekly” requires modification during cold months.
Reduce fertilizer concentration to one-quarter strength and extend intervals to every two to three weeks. This adjusted schedule provides sufficient nutrients without overwhelming plants experiencing slower metabolic rates. Bloom-boosting formulations with higher phosphorus content support flower spike development when applied beginning in late winter.
Monitoring and Flushing Techniques
Regular flushing removes accumulated salts that build up even with reduced fertilization. Monthly clear water flushes involve thoroughly soaking growing media and allowing excess water to drain completely. This practice prevents the white crusty deposits that indicate dangerous salt levels.
| Season | Fertilizer Strength | Frequency | Formula Type |
|---|---|---|---|
| Winter | 1/4 strength | Every 2-3 weeks | Balanced or bloom-boost |
| Spring | 1/2 strength | Weekly | Balanced |
| Summer | 1/2 strength | Weekly | Growth formula |
| Fall | 1/3 strength | Every 10 days | Balanced |
These winter care practices lay the groundwork for spectacular spring displays.
How to Prepare Your Orchids for Spring
Transitioning Care Routines
As daylight hours extend and temperatures moderate, orchids respond with renewed growth vigor. This transitional period demands gradual adjustments rather than abrupt changes that shock plants. Begin increasing water frequency as new root tips emerge, indicated by bright green growing points. Resume regular fertilization schedules using balanced formulations that support both vegetative growth and continued flowering.
Repotting considerations become relevant as spring approaches. Orchids showing overcrowded roots, decomposed media, or those that haven’t been repotted in two years benefit from fresh growing mix. Schedule this task for after flowering concludes but before peak summer heat arrives, giving plants maximum recovery time.
Maximizing Spring Blooming Potential
The care provided during winter directly determines spring flowering success. Plants that survived cold months without stress produce robust flower spikes with numerous buds. Support these developing inflorescences with appropriate staking, gentle ties, and continued attention to environmental stability:
- Maintain consistent temperatures as flower buds develop
- Avoid moving plants once buds form to prevent orientation confusion
- Continue humidity support throughout the blooming period
- Increase air circulation to prevent fungal issues on opening flowers
- Gradually increase light exposure as outdoor conditions brighten
Orchids that successfully navigate winter challenges reward dedicated growers with spectacular blooming displays that justify the careful attention invested throughout cold months. The critical decisions made regarding window placement, temperature management, and environmental control separate thriving specimens from struggling survivors. By understanding the specific vulnerabilities that winter conditions create and implementing protective strategies, enthusiasts transform potential obstacles into opportunities for cultivating healthier, more floriferous plants. The knowledge that proper positioning away from cold glass surfaces, combined with adequate humidity and adjusted nutrition, prevents the common errors that stop blooming entirely empowers growers to achieve consistent success with these magnificent plants.