

March marks a pivotal moment for gardeners eager to get a head start on their summer harvest. While winter still lingers in many regions, this transitional month offers the perfect opportunity to begin sowing seeds indoors. Starting vegetables from seed in early March allows plants to develop strong root systems and mature foliage before transplanting outdoors when temperatures stabilize. This strategic timing ensures robust plants that can withstand the demands of summer growing conditions while providing an earlier harvest than direct-sown alternatives. Understanding which vegetables thrive when started during this specific window can transform your gardening success and maximize your productive growing season.
Choosing the right vegetable seeds for early March
Selecting appropriate vegetables for early March sowing requires understanding growth rates, temperature tolerance, and maturation timelines. Not all vegetables benefit from this early start, making informed choices critical for success.
Seven ideal vegetables for March sowing
These seven vegetables respond exceptionally well to early March indoor sowing:
- Tomatoes: requiring 6-8 weeks before transplanting, these warm-season favorites need the extended indoor period to develop sufficient size
- Peppers: both sweet and hot varieties benefit from 8-10 weeks of indoor growth due to their slow germination and development
- Eggplant: demanding similar conditions to peppers, eggplants need 8-10 weeks to reach transplant-ready size
- Brussels sprouts: cool-season crops that require 4-6 weeks indoors before moving to the garden
- Broccoli: fast-growing brassicas needing only 4-6 weeks of protected growth
- Cabbage: hardy vegetables that establish well with 4-6 weeks of indoor development
- Cauliflower: requiring careful temperature management and 4-6 weeks before transplanting
Understanding seed packet information
Seed packets provide essential timing information that guides successful planting. The “days to maturity” specification indicates the period from transplanting to harvest, not from seed sowing. Days to germination reveals how long seeds take to sprout under ideal conditions, helping you plan backwards from your last expected frost date. This information becomes your roadmap for determining whether early March suits specific varieties in your climate zone.
| Vegetable | Days to Germination | Weeks Indoors | Days to Maturity |
|---|---|---|---|
| Tomatoes | 5-10 | 6-8 | 60-85 |
| Peppers | 10-20 | 8-10 | 60-90 |
| Eggplant | 7-14 | 8-10 | 70-85 |
| Broccoli | 5-10 | 4-6 | 55-70 |
With appropriate varieties selected based on your specific growing zone and harvest goals, attention turns to creating the optimal environment for germination and early growth.
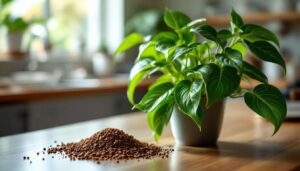
Preparing soil and containers for indoor seeding
Proper preparation of growing medium and containers establishes the foundation for healthy seedling development. Shortcuts during this stage often result in damping-off disease, poor germination, or weak plants.
Selecting seed-starting mix versus garden soil
Never use garden soil for starting seeds indoors. Garden soil compacts in containers, restricts oxygen flow to developing roots, and often harbors pathogens, weed seeds, and pest eggs. Purpose-formulated seed-starting mixes offer superior drainage, appropriate nutrient levels, and sterile conditions. These soilless mixtures typically combine peat moss or coconut coir with perlite or vermiculite, creating the light, fluffy texture that emerging roots require. The sterile nature prevents damping-off, a fungal disease that devastates young seedlings.
Container options and drainage requirements
Container selection significantly impacts seedling health. Options include:
- Cell packs: economical plastic trays with individual cells preventing root entanglement
- Peat pots: biodegradable containers planted directly into soil, minimizing transplant shock
- Soil blocks: compressed growing medium eliminating containers entirely while promoting superior root development
- Recycled containers: yogurt cups, egg cartons, or newspaper pots providing sustainable alternatives
Regardless of container type, drainage holes are absolutely essential. Without proper drainage, water accumulates, creating anaerobic conditions that suffocate roots and encourage fungal growth. Containers should sit in trays that catch excess water while preventing standing moisture.
Sterilizing equipment to prevent disease
Sterilizing containers and tools before use eliminates disease organisms from previous growing seasons. Wash containers thoroughly with hot, soapy water, then soak in a solution of one part bleach to nine parts water for ten minutes. Rinse completely and allow to air dry. This simple process dramatically reduces seedling mortality from preventable diseases.
Once containers are prepared and filled with moistened seed-starting mix, the actual sowing process requires precision and attention to specific requirements for each vegetable type.
Sowing vegetables suited for early conditions
Successful germination depends on proper sowing depth, spacing, and environmental conditions tailored to each vegetable’s specific needs.
Correct planting depth for different seeds
The general rule states that seeds should be planted at a depth approximately two to three times their diameter. However, specific vegetables have particular requirements:
| Vegetable | Seed Size | Planting Depth | Seeds per Cell |
|---|---|---|---|
| Tomatoes | Small | ¼ inch | 2-3 |
| Peppers | Small | ¼ inch | 2-3 |
| Eggplant | Small | ¼ inch | 2-3 |
| Broccoli | Small | ¼-½ inch | 2-3 |
| Cabbage | Small | ¼-½ inch | 2-3 |
Planting multiple seeds per cell provides insurance against poor germination. Once seedlings emerge and develop true leaves, thin to the strongest individual by snipping weaker seedlings at soil level rather than pulling them, which disturbs remaining roots.
Temperature requirements for germination
Temperature profoundly influences germination speed and success rates. Warm-season vegetables like tomatoes, peppers, and eggplant germinate best at 75-85°F. Cool-season crops including broccoli, cabbage, and cauliflower prefer 65-75°F. Heat mats placed under seed trays maintain consistent soil temperatures, dramatically improving germination rates and speed. Once seedlings emerge, slightly cooler temperatures of 60-70°F promote stocky, robust growth rather than leggy, weak stems.
Light exposure from the moment of germination
Seedlings require 14-16 hours of bright light daily immediately upon emergence. Insufficient light causes etiolation, producing tall, spindly plants with weak stems that struggle after transplanting. South-facing windows rarely provide adequate intensity, making supplemental lighting essential for most indoor growing situations. Position fluorescent or LED grow lights 2-3 inches above seedling tops, raising fixtures as plants grow to maintain this distance.
With seeds properly sown and environmental conditions optimized, ongoing care determines whether seedlings thrive or merely survive until transplant time.
Tips for watering and caring for young plants
Consistent, appropriate care during the seedling stage builds strong, resilient plants capable of thriving after transplanting into garden conditions.
Watering techniques to prevent damping-off
Overwatering represents the primary cause of seedling failure. The growing medium should remain evenly moist but never waterlogged. Check moisture by inserting a finger into the soil; water only when the top half-inch feels dry. Bottom watering by placing containers in trays of water allows roots to draw moisture upward, keeping foliage dry and reducing fungal disease risk. Remove trays after 20-30 minutes once the soil surface appears moist. Using room-temperature water prevents shocking tender roots with cold liquid straight from the tap.
Fertilizing schedules for seedling development
Seed-starting mix contains minimal nutrients, requiring supplemental feeding once seedlings develop true leaves. True leaves appear after the initial cotyledons and display the characteristic shape of mature foliage. Begin fertilizing with half-strength liquid fertilizer weekly, using formulations balanced in nitrogen, phosphorus, and potassium. Excessive fertilization produces lush but weak growth with reduced transplant success. Organic options include diluted fish emulsion or seaweed extract, both providing micronutrients alongside primary elements.
Providing air circulation to strengthen stems
Gentle air movement strengthens stems through a process called thigmomorphogenesis, where physical stimulation triggers structural reinforcement. Position a small oscillating fan to create subtle air movement around seedlings for several hours daily. This simple practice produces stockier plants with thicker stems better equipped to withstand outdoor wind conditions. Avoid strong, direct airflow that desiccates growing medium or damages tender leaves.
As seedlings mature and outdoor conditions moderate, the transition from protected indoor environments to garden beds requires careful planning and execution to ensure survival and continued growth.
Transplanting seedlings outdoors for a summer harvest
Moving seedlings from controlled indoor conditions to variable outdoor environments represents a critical transition requiring gradual acclimation and proper timing.
Hardening off process and timeline
Hardening off acclimates seedlings to outdoor conditions through gradual exposure over 7-10 days. This process prevents transplant shock that stunts growth or kills plants. The systematic approach includes:
- Days 1-2: place seedlings in a sheltered, shaded outdoor location for 2-3 hours
- Days 3-4: increase outdoor time to 4-5 hours, introducing filtered sunlight
- Days 5-6: extend exposure to 6-8 hours with some direct sun
- Days 7-8: leave plants outdoors all day, bringing inside overnight if temperatures drop below 50°F
- Days 9-10: leave outdoors overnight if temperatures remain above 50°F
Monitor plants closely during this period. Wilting, leaf discoloration, or stunted growth indicate excessive stress requiring slower acclimation.
Determining the right transplant date
Transplant timing depends on both plant readiness and environmental conditions. Wait until seedlings have developed 4-6 true leaves and strong root systems visible through drainage holes. Environmental considerations include:
| Vegetable Type | Minimum Soil Temperature | Frost Tolerance | Transplant Timing |
|---|---|---|---|
| Tomatoes, Peppers, Eggplant | 60°F | None | After last frost |
| Broccoli, Cabbage, Cauliflower | 45°F | Light frost | 2-4 weeks before last frost |
Soil temperature matters more than air temperature for root establishment. Use a soil thermometer to verify conditions before transplanting warm-season crops.
Proper spacing and planting techniques
Adequate spacing prevents competition for nutrients, water, and light while improving air circulation that reduces disease pressure. Dig holes slightly larger than root balls, gently remove seedlings from containers, and position at the same depth they grew indoors, except for tomatoes which benefit from deeper planting. Tomatoes develop adventitious roots along buried stems, creating more extensive root systems when planted deeply. Water thoroughly immediately after transplanting, ensuring soil settles around roots without air pockets.
Even with proper hardening off and careful transplanting, young plants face numerous environmental challenges during their first weeks in the garden that can compromise or destroy your investment of time and effort.
Tips for protecting young plants from weather extremes
Newly transplanted seedlings remain vulnerable to temperature fluctuations, wind, and intense sunlight until they establish robust root systems in their new environment.
Using row covers and cloches for frost protection
Unexpected late-season frosts threaten tender transplants even after average last frost dates pass. Floating row covers made from spunbonded fabric provide 4-8°F of frost protection while allowing light, water, and air penetration. Drape covers over plants in late afternoon when frost threatens, securing edges with soil, boards, or landscape staples. Individual cloches fashioned from milk jugs with bottoms removed, Wall O’ Water sleeves, or commercial plant protectors create microenvironments around individual plants. Remove protection during warm days to prevent overheating and replace before temperatures drop at night.
Shading techniques during heat waves
Intense sunlight and high temperatures stress newly transplanted seedlings before roots establish sufficiently to support transpiration demands. Temporary shade cloth with 30-50% shading reduces light intensity and lowers temperatures. Position shade structures on the south and west sides where afternoon sun strikes most intensely. Alternatives include:
- Shade fabric: suspended on stakes or frames above plants
- Lath structures: creating dappled shade patterns
- Companion planting: using taller, established plants to shelter newcomers
- Temporary umbrellas: providing individual plant protection
Wind protection strategies for tender seedlings
Wind desiccates foliage faster than roots can replace moisture, causing wilting and tissue damage. Physical barriers reduce wind speed and turbulence around vulnerable plants. Establish temporary windbreaks using burlap attached to stakes, commercial wind fabric, or strategic placement of larger plants. Position barriers perpendicular to prevailing winds at distances of 2-5 times their height from protected plants. Gradual exposure to gentle breezes during hardening off builds stem strength, but sustained strong winds overwhelm newly transplanted seedlings before they anchor securely.
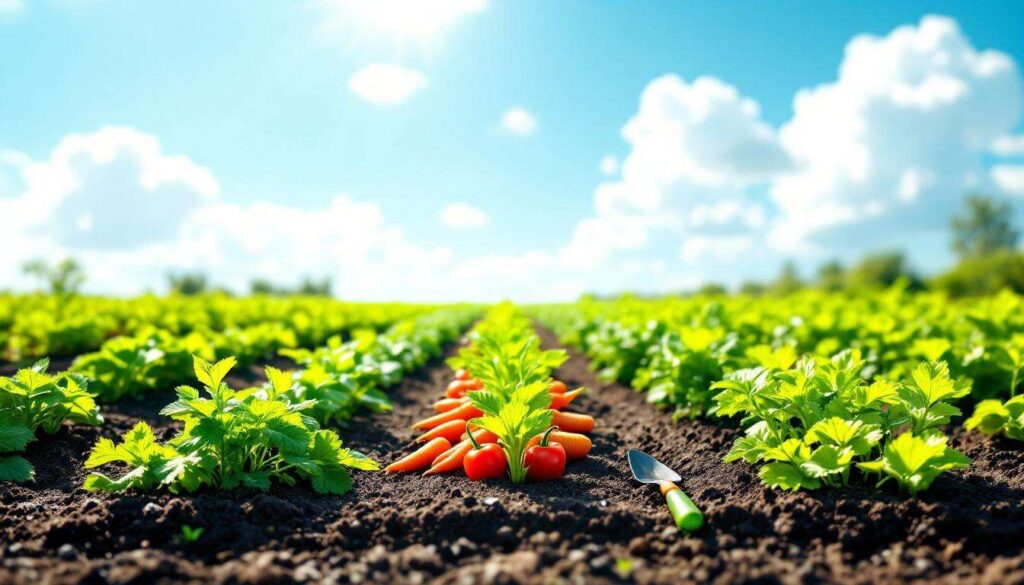
Starting vegetables from seed in early March positions gardeners for abundant summer harvests while extending the productive growing season. The seven vegetables highlighted thrive when given this head start, developing into robust plants capable of producing generous yields. Success requires selecting appropriate varieties, preparing proper growing medium and containers, sowing seeds at correct depths with optimal environmental conditions, providing consistent care during seedling development, carefully hardening off before transplanting, and protecting young plants from weather extremes during establishment. This systematic approach transforms seeds into thriving garden plants that reward your efforts with fresh, homegrown produce throughout the summer months. The investment of time and attention during these critical early stages pays dividends in plant health, harvest timing, and overall garden productivity.