


Starting tomato seeds indoors during March provides gardeners with a strategic advantage that can significantly impact their harvest. This timing allows seedlings to develop strong root systems and sturdy stems before outdoor temperatures become favorable for transplanting. The controlled environment of indoor cultivation protects young plants from unpredictable spring weather while extending the growing season by several weeks. By mastering the indoor start method, home gardeners can achieve robust plants that produce nearly double the fruit compared to direct-sown or late-started varieties.
Selecting the best tomato varieties for an indoor start in March
Determinate versus indeterminate varieties
Choosing between determinate and indeterminate tomato varieties directly affects your planting strategy and expected yield. Determinate tomatoes grow to a fixed height, produce fruit over a concentrated period, and work well for gardeners seeking a single large harvest. Indeterminate varieties continue growing throughout the season, producing fruit until frost arrives, making them ideal for continuous harvests and maximizing yield potential.
Early, mid-season, and late varieties
Matching variety maturity times to your climate zone ensures optimal production:
- Early varieties (55-65 days) like ‘Early Girl’ and ‘Fourth of July’ suit short growing seasons
- Mid-season varieties (70-80 days) including ‘Celebrity’ and ‘Big Beef’ offer balanced timing
- Late varieties (80+ days) such as ‘Brandywine’ and ‘Cherokee Purple’ provide exceptional flavor for longer seasons
Disease-resistant cultivars for higher success rates
Selecting disease-resistant varieties reduces crop loss and maintenance requirements. Look for seed packets indicating resistance to common problems:
| Disease Code | Disease Name | Resistant Varieties |
|---|---|---|
| V | Verticillium Wilt | Better Boy, Mountain Fresh |
| F | Fusarium Wilt | Celebrity, Big Beef |
| N | Nematodes | Mountain Pride, Bella Rosa |
Understanding these variety characteristics helps gardeners make informed selections that align with their climate, space availability, and harvest preferences, setting the foundation for successful indoor starting.
Preparing the necessary materials for indoor sowing
Containers and drainage requirements
Proper containers prevent waterlogging and root diseases. Seed starting trays with individual cells measuring 2-3 inches deep provide adequate space for initial root development. Ensure each container has drainage holes to allow excess water to escape. Biodegradable peat pots or paper containers offer the advantage of direct transplanting without disturbing roots.
Seed starting mix composition
Regular garden soil is too dense for seed starting and may harbor pathogens. A quality seed starting mix should contain:
- Peat moss or coconut coir for moisture retention
- Perlite or vermiculite for drainage and aeration
- Small amounts of lime to balance pH levels
This lightweight, sterile medium encourages rapid germination while preventing damping-off disease that commonly affects seedlings.
Lighting equipment for optimal growth
Natural window light rarely provides sufficient intensity for stocky seedling development. Full-spectrum LED grow lights positioned 2-4 inches above seedlings deliver the necessary light intensity. Plan for 14-16 hours of daily light exposure, using timers to maintain consistency. Fluorescent shop lights with both cool and warm bulbs offer a budget-friendly alternative.
Temperature control tools
Tomato seeds germinate best at temperatures between 70-80°F. Seedling heat mats placed beneath trays accelerate germination by maintaining consistent soil temperature. Once seedlings emerge, ambient temperatures of 65-75°F during the day and 60-65°F at night promote sturdy growth without encouraging excessive stretching.
With materials assembled and organized, gardeners can proceed confidently to the actual sowing process that initiates the growth cycle.
Key steps for successful tomato sowing in March
Pre-soaking seeds for faster germination
Soaking tomato seeds in room-temperature water for 6-8 hours before planting softens the seed coat and can reduce germination time by 1-2 days. This optional step proves particularly beneficial for older seeds or varieties with thicker seed coats. After soaking, drain seeds and plant immediately to prevent mold development.
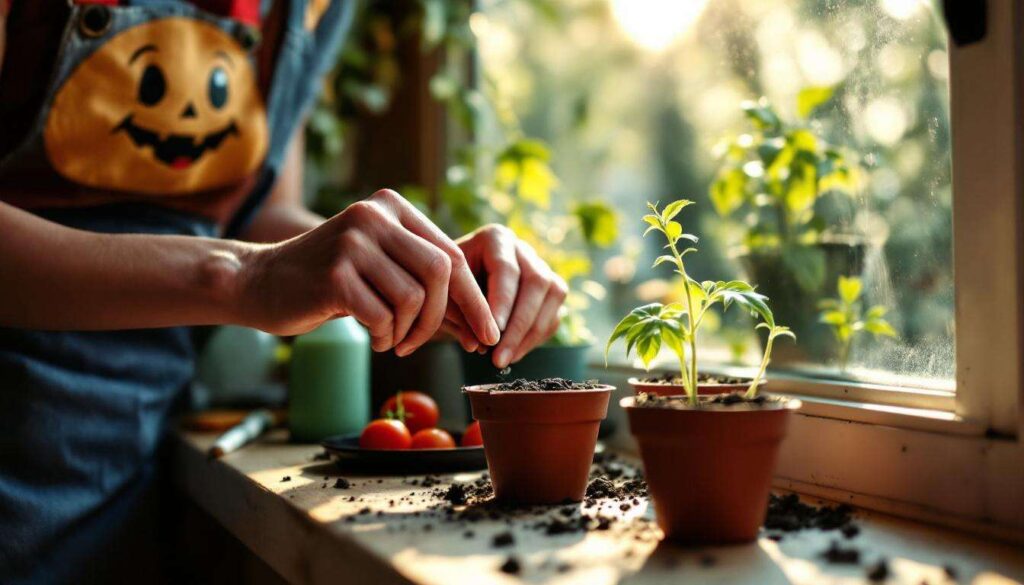
Proper planting depth and spacing
Plant tomato seeds at a depth of 1/4 inch in pre-moistened seed starting mix. This shallow depth allows emerging seedlings to reach the surface quickly while maintaining adequate moisture contact. Space seeds 2 inches apart in trays or plant 2-3 seeds per individual cell, thinning to the strongest seedling after emergence.
Creating optimal moisture conditions
Maintaining consistent moisture without oversaturation is critical during germination:
- Cover trays with clear plastic domes or plastic wrap to retain humidity
- Check daily and remove covering once seedlings emerge
- Water from below by placing trays in shallow water, allowing capillary action to moisten soil
- Avoid overhead watering that can dislodge seeds or cause damping-off
Germination timeline expectations
Under ideal conditions, tomato seeds typically germinate within 5-10 days. Temperature significantly affects this timeline, with warmer conditions producing faster emergence. Once the first true leaves appear (the second set of leaves after the initial seed leaves), seedlings enter a rapid growth phase requiring adjusted care.
As seedlings develop beyond germination, attention shifts to environmental factors that determine whether plants grow strong or become weak and leggy.
Tips to optimize indoor growing conditions
Adjusting light distance and duration
Maintaining proper light proximity prevents stretching and encourages compact, sturdy growth. Keep grow lights 2-4 inches above the top leaves, raising fixtures as plants grow. Seedlings require 14-16 hours of light daily, followed by 8-10 hours of darkness for proper metabolic function. Excessive light duration does not improve growth and may stress plants.
Fertilization schedule for seedlings
Seed starting mix contains minimal nutrients, requiring supplemental feeding once true leaves develop. Apply a diluted liquid fertilizer at quarter strength weekly, gradually increasing to half strength as plants mature. Balanced formulas with equal N-P-K ratios (such as 10-10-10) support overall development without promoting excessive foliage at the expense of root growth.
Air circulation and strengthening techniques
Indoor seedlings lack natural wind exposure that strengthens stems. Implement these strategies:
- Position a small oscillating fan to create gentle air movement for 2-3 hours daily
- Gently brush hands across seedling tops daily to stimulate thickening response
- Maintain adequate spacing between plants to prevent crowding and fungal issues
Preventing common seedling problems
Vigilant monitoring helps identify issues before they become severe:
| Problem | Symptom | Solution |
|---|---|---|
| Damping-off | Seedlings collapse at soil line | Improve air circulation, reduce watering |
| Leggy growth | Tall, weak stems | Increase light intensity, lower temperature |
| Yellowing leaves | Pale or yellow foliage | Begin fertilization program |
These cultivation practices prepare seedlings for the critical transition from protected indoor environment to outdoor garden conditions.
When and how to transplant tomato seedlings outdoors
Hardening off process and timeline
The hardening off period gradually acclimates indoor-grown seedlings to outdoor conditions over 7-10 days. Begin when outdoor temperatures consistently reach 50°F at night and seedlings have 4-6 true leaves. Start with 1-2 hours of outdoor exposure in a protected, shaded location, increasing time and sun exposure daily. Bring plants indoors if temperatures drop below 45°F or strong winds threaten damage.
Identifying the right transplant timing
Transplant tomatoes outdoors when soil temperature reaches 60°F and all danger of frost has passed. For March-started seedlings, this typically occurs 6-8 weeks after sowing, usually in late April through May depending on your zone. Seedlings ready for transplant should be 6-8 inches tall with sturdy stems and well-developed root systems visible through drainage holes.
Proper transplanting technique
Tomatoes benefit from deep planting that encourages additional root development along buried stems:
- Dig holes deeper than the root ball, allowing burial of the stem up to the lowest leaves
- Remove lower leaves that would be underground
- Place seedlings in holes and fill with soil, firming gently around stems
- Water thoroughly to eliminate air pockets and settle soil
- Space plants 24-36 inches apart depending on variety
Post-transplant protection measures
Newly transplanted seedlings require temporary protection from environmental stress. Use row covers, cloches, or Wall O’ Water devices to shield plants from temperature fluctuations and wind during the first week. Provide shade during intense midday sun for 3-4 days to prevent transplant shock. Monitor soil moisture carefully as transplants establish, watering when the top inch becomes dry.
Once established in their permanent locations, tomatoes require ongoing care that maximizes their productive potential throughout the growing season.
Increasing yield: fertilization and maintenance of outdoor plants
Fertilization strategy for maximum production
Outdoor tomatoes are heavy feeders requiring consistent nutrient supply. Apply a balanced fertilizer at transplanting, then switch to a formula higher in phosphorus and potassium (such as 5-10-10) once flowering begins to promote fruit development over foliage. Side-dress plants with compost or granular fertilizer every 3-4 weeks, or apply diluted liquid fertilizer weekly for continuous nutrient availability.
Staking and pruning techniques
Proper support and pruning dramatically impact yield and fruit quality:
- Install stakes or cages at transplanting to avoid root damage later
- Prune indeterminate varieties by removing suckers (shoots between main stem and branches)
- Leave 1-2 main stems for maximum production
- Remove lower leaves touching soil to prevent disease transmission
- Maintain adequate air circulation through the plant canopy
Watering practices for optimal fruit development
Consistent moisture levels prevent common fruit problems like blossom end rot and cracking. Provide 1-2 inches of water weekly through deep, infrequent watering rather than frequent shallow applications. Mulch around plants with 2-3 inches of organic material to retain moisture, regulate soil temperature, and suppress weeds. Avoid overhead watering that promotes foliar diseases, directing water to the root zone instead.
Pest and disease monitoring
Regular inspection allows early intervention before problems escalate. Check plants weekly for common issues:
| Pest/Disease | Identification | Management |
|---|---|---|
| Hornworms | Large green caterpillars | Hand-pick or apply Bt spray |
| Early blight | Brown spots with concentric rings | Remove affected leaves, improve air flow |
| Aphids | Small insects on new growth | Spray with water or insecticidal soap |
Starting tomato seeds indoors during March provides gardeners with robust plants capable of exceptional production. The combination of variety selection, proper indoor cultivation techniques, careful transplanting, and ongoing maintenance creates conditions for yields that significantly exceed those from direct-sown or purchased transplants. By investing time in the early stages of plant development and maintaining consistent care throughout the season, home gardeners can harvest abundant, flavorful tomatoes from plants that reach their full genetic potential. This method transforms the growing season from a race against time into a carefully orchestrated process that rewards attention to detail with baskets full of homegrown produce.