


Orchids captivate plant enthusiasts with their exotic beauty and delicate blooms, yet many struggle to maintain their flowering during colder months. Winter presents unique challenges for these tropical plants, as reduced daylight and dry indoor heating can halt their blooming cycle entirely. However, a simple kitchen-based approach leverages natural temperature fluctuations and environmental conditions to trigger spectacular displays of flowers, even in the depths of winter. This method harnesses the microclimate already present in most kitchens, transforming an ordinary room into an ideal orchid sanctuary that mimics their native habitat.
Understanding orchid needs in winter
The natural dormancy cycle of orchids
Orchids follow seasonal rhythms even when grown indoors, requiring specific environmental cues to initiate their blooming phase. During winter months, many orchid species enter a rest period where growth slows and energy reserves build for future flower production. This dormancy phase is not a sign of decline but rather a natural preparation stage that requires careful management to ensure robust blooming.
Temperature variations between day and night play a crucial role in signaling to the plant that conditions are favorable for flowering. In their native tropical and subtropical environments, orchids experience:
- Cooler nighttime temperatures ranging from 55°F to 65°F
- Warmer daytime conditions between 70°F and 80°F
- Consistent humidity levels above 50 percent
- Filtered or indirect sunlight for 10 to 12 hours daily
Common winter stressors for indoor orchids
Indoor heating systems create an artificially dry environment that contradicts orchid requirements. Central heating reduces relative humidity to levels as low as 20 to 30 percent, causing stress that manifests through yellowing leaves, shriveled pseudobulbs, and bud blast where developing flowers drop before opening. Additionally, shorter daylight hours limit the photosynthetic activity necessary for energy production.
| Winter Stressor | Impact on Orchids | Typical Indoor Level | Ideal Level |
|---|---|---|---|
| Low humidity | Dehydration and bud drop | 20-30% | 50-70% |
| Constant temperature | Inhibited bloom trigger | 68-72°F constant | 10-15°F day/night variation |
| Reduced light | Weak growth and no flowers | 6-8 hours | 10-12 hours |
Recognizing these challenges allows orchid caretakers to address specific deficiencies rather than applying generic care routines. The kitchen environment naturally counteracts many of these winter stressors through its unique characteristics.
How to prepare your kitchen for orchid care
Selecting the optimal location
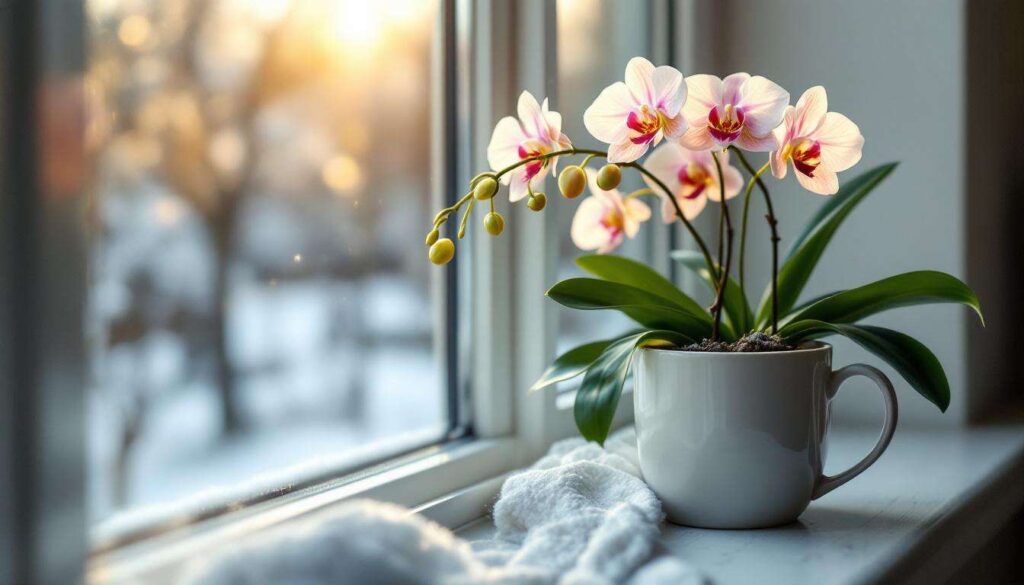
The kitchen offers microclimates that closely resemble tropical conditions, making it an ideal winter home for orchids. Position plants near east or west-facing windows where they receive bright indirect light without exposure to harsh midday sun that can scorch leaves. Avoid placing orchids directly above heat sources such as radiators or near cold drafts from frequently opened doors.
Consider these placement factors:
- Distance from the window should be 2 to 4 feet for optimal light exposure
- Elevation on counters or shelves keeps plants away from floor-level cold drafts
- Proximity to sinks provides easy access for watering and misting
- Clearance from cooking surfaces prevents exposure to grease and excessive heat
Creating humidity zones
Kitchens naturally generate humidity through cooking activities, dishwashing, and boiling water. Enhance this benefit by grouping orchids together on humidity trays filled with water and pebbles. The evaporating water creates a localized humid microclimate without waterlogging the roots, which would cause rot.
To construct an effective humidity tray, place a shallow waterproof tray beneath orchid pots, add a layer of decorative pebbles or gravel, and fill with water to just below the pebble surface. The pot sits on the pebbles, never touching the water directly, allowing air circulation while benefiting from rising moisture.
Ensuring proper air circulation
Unlike many houseplants, orchids require consistent air movement to prevent fungal infections and promote healthy gas exchange. Kitchen environments typically provide natural air circulation from cooking activities and ventilation systems. If air remains stagnant, position a small fan on low speed to create gentle movement without directly blasting plants, which would cause excessive moisture loss.
With the physical space optimized, the next critical factor involves manipulating temperature patterns to stimulate the flowering response that makes orchids so spectacular.
The secret of varying temperatures to encourage blooming
The science behind temperature fluctuation
Orchids possess photoreceptors and temperature-sensitive proteins that detect environmental changes and trigger hormonal responses. When exposed to a temperature drop of 10 to 15 degrees Fahrenheit between day and night, these plants interpret the signal as seasonal change, initiating the biochemical processes that lead to flower spike development.
This phenomenon occurs because temperature variation affects:
- Ethylene production levels that regulate flowering hormones
- Carbohydrate metabolism and energy allocation to reproductive structures
- Gene expression patterns associated with bloom initiation
- Water uptake and nutrient distribution within plant tissues
Implementing the kitchen temperature trick
The kitchen naturally experiences temperature fluctuations that other rooms lack. During evening hours, when cooking activities cease and heating systems reduce output, temperatures drop naturally. By placing orchids near windows overnight, they experience cooler conditions ranging from 55°F to 60°F, while daytime kitchen activity and sunlight warm the space to 70°F to 75°F.
This simple repositioning creates the thermal differential orchids require without artificial intervention. For maximum effect, maintain this pattern consistently for 4 to 6 weeks during the orchid’s natural blooming season, typically late winter through early spring for many popular varieties including Phalaenopsis and Cattleya.
Monitoring temperature patterns
Use a digital thermometer with minimum and maximum recording functions to track actual temperature ranges in your chosen location. Place the sensor at orchid height rather than relying on general room temperatures, as microclimates can vary significantly within a single space.
| Time Period | Target Temperature | Location Strategy |
|---|---|---|
| Morning (6 AM – 12 PM) | 65-70°F | Near window with morning light |
| Afternoon (12 PM – 6 PM) | 70-75°F | Kitchen counter with activity |
| Evening (6 PM – 10 PM) | 65-68°F | Away from cooking heat |
| Night (10 PM – 6 AM) | 55-60°F | Near window, away from heating vents |
Temperature manipulation works synergistically with other environmental factors to create comprehensive conditions for successful blooming.
The importance of humidity and light in the kitchen
Maximizing natural humidity sources
Kitchen activities generate substantial moisture that benefits orchids throughout winter. Running the dishwasher, boiling pasta, steaming vegetables, and washing dishes all release water vapor into the air. Position orchids to benefit from this humidity without exposing them to direct steam or water spray, which can damage flowers and create conditions for bacterial spotting on leaves.
Strategic placement recommendations include:
- Positioning plants 3 to 5 feet from the stove to benefit from ambient moisture without heat damage
- Placing orchids near but not directly beside the sink to avoid water splashes
- Grouping multiple orchids together to create a shared humid microclimate
- Maintaining humidity trays with fresh water to supplement natural kitchen moisture
Supplementing humidity during dry periods
On days with minimal cooking activity, manual misting provides supplemental moisture. Use room-temperature filtered water in a fine-mist spray bottle, applying moisture to the air around plants rather than directly onto leaves or flowers. Mist during morning hours to allow excess moisture to evaporate before cooler evening temperatures, preventing fungal issues.
Optimizing light exposure
Winter sunlight enters at a lower angle and with reduced intensity compared to summer months. Orchids require adequate light intensity to produce the energy necessary for blooming. East-facing kitchen windows provide gentle morning sun ideal for Phalaenopsis orchids, while west-facing windows suit light-hungry varieties like Cattleya and Dendrobium.
Monitor light levels by observing leaf color. Healthy orchids display medium to light green foliage, while dark green leaves indicate insufficient light and reddish or yellowish tones suggest excessive exposure. Adjust placement accordingly, moving plants closer to or farther from windows based on these visual cues.
Extending daylight hours artificially
When natural daylight falls below 10 hours daily, supplement with full-spectrum LED grow lights positioned 12 to 18 inches above orchid foliage. Set timers to provide consistent photoperiods of 12 to 14 hours, ensuring plants receive adequate light energy without disrupting their natural circadian rhythms.
Understanding these environmental factors prepares caretakers to recognize and prevent the most common errors that sabotage winter orchid care.
Tips to avoid common winter mistakes
Overwatering during dormancy
The most frequent orchid killer involves excessive watering when plants require less moisture during their rest period. Reduced light and cooler temperatures slow metabolic processes, decreasing water uptake. Roots sitting in soggy media develop rot that spreads rapidly, causing yellowing leaves and eventual plant death.
Proper winter watering practices include:
- Checking media dryness by inserting a wooden skewer 2 inches deep; water only when it emerges completely dry
- Reducing watering frequency to every 10 to 14 days rather than weekly schedules
- Using room-temperature water to avoid shocking roots with cold temperatures
- Watering in morning hours to allow excess moisture to evaporate during the day
- Ensuring pots have adequate drainage holes and never allowing plants to sit in standing water
Fertilizing too frequently
During winter dormancy, orchids require minimal nutrients as growth slows significantly. Applying fertilizer at summer rates causes salt buildup in potting media, burning delicate roots and creating toxic conditions. Reduce fertilization to once monthly using a balanced orchid formula diluted to quarter strength, or suspend feeding entirely during the coldest months.
Ignoring pest infestations
Dry indoor conditions favor common orchid pests including scale insects, mealybugs, and spider mites. These pests thrive in low-humidity environments and multiply rapidly on stressed plants. Inspect orchids weekly, examining leaf undersides, stem joints, and flower spikes for signs of infestation.
| Pest Type | Identification Signs | Treatment Method |
|---|---|---|
| Scale insects | Brown or white bumps on stems and leaves | Remove manually with cotton swab dipped in rubbing alcohol |
| Mealybugs | White cottony masses in leaf joints | Spray with insecticidal soap weekly for 3 weeks |
| Spider mites | Fine webbing and stippled leaves | Increase humidity and rinse leaves with water |
Repotting at the wrong time
Winter represents the worst season for repotting orchids, as plants lack the energy and active growth necessary to establish new roots in fresh media. Disturbing roots during dormancy causes excessive stress that can prevent blooming or kill weakened plants. Schedule repotting for spring when new growth emerges and temperatures rise consistently.
Avoiding these pitfalls sets the foundation for successful orchid care, but consistent maintenance practices ensure spectacular results.
Regular follow-up and maintenance for stunning orchids
Establishing a monitoring routine
Successful orchid care requires systematic observation rather than reactive intervention. Dedicate time weekly to examine each plant thoroughly, checking for changes in leaf color, root condition, and emerging growth. Document observations in a simple log noting watering dates, fertilizer applications, and environmental conditions to identify patterns and adjust care accordingly.
Adjusting care as blooming approaches
When flower spikes emerge, typically 6 to 8 weeks after implementing the temperature variation technique, orchids require modified care to support bloom development. Increase watering frequency slightly as the spike elongates, ensuring media remains consistently moist but never waterlogged. Resume regular fertilization with a bloom-promoting formula higher in phosphorus to support flower formation.
Support developing flower spikes with:
- Bamboo stakes inserted carefully to avoid root damage
- Soft plant ties securing the spike at 2 to 3 inch intervals
- Continued temperature variation to promote maximum bud development
- Stable positioning to prevent bud blast from movement or environmental changes
Maintaining bloom longevity
Once flowers open, orchids can bloom for several weeks to several months depending on variety and care quality. Extend bloom duration by maintaining consistent conditions without drastic changes in temperature, humidity, or light. Remove spent flowers promptly to redirect energy toward remaining buds and prevent fungal issues from decaying plant material.
Post-bloom care preparation
After flowers fade, orchids enter another rest phase before initiating new growth cycles. Cut flower spikes according to variety-specific guidelines: Phalaenopsis spikes can be trimmed above the third node to encourage secondary blooming, while other varieties require complete spike removal at the base. Continue consistent care with reduced watering and fertilization until new growth signals the beginning of another active phase.
The kitchen trick for winter orchid care combines natural environmental advantages with strategic temperature manipulation to trigger reliable blooming. By understanding orchid dormancy cycles, preparing appropriate kitchen locations with optimal humidity and light, implementing day-night temperature variations, avoiding common mistakes like overwatering and improper fertilization, and maintaining consistent monitoring routines, even novice growers achieve spectacular flowering displays. This method harnesses existing conditions rather than requiring expensive equipment, making successful orchid cultivation accessible throughout the coldest months when these tropical beauties prove their resilience and reward patient care with breathtaking blooms.