

Growing celery and fennel from seed requires patience and planning, but the reward of harvesting these flavorful vegetables from your own garden makes the effort worthwhile. Both crops demand a long growing season and benefit significantly from an early start indoors during March. This head start allows gardeners to transplant robust seedlings after the last frost, ensuring plants have adequate time to mature before summer heat sets in. Understanding the specific needs of these vegetables transforms what might seem like challenging crops into manageable and productive additions to any vegetable garden.
Introduction to celery and fennel in the garden
Understanding celery characteristics
Celery (Apium graveolens) stands as one of the most demanding vegetables for home gardeners. This biennial plant, grown as an annual, requires consistent moisture, fertile soil, and cool temperatures to develop its signature crisp stalks. The vegetable needs approximately 130 to 140 days from seed to harvest, making an indoor start essential for most growing zones. Celery produces tight bunches of ribbed stalks with aromatic leaves that add distinctive flavor to countless dishes.
Exploring fennel varieties
Fennel presents gardeners with two distinct options: Florence fennel (also called bulb fennel) and herb fennel. Florence fennel develops a swollen bulb-like base prized for its anise flavor and crunchy texture, while herb fennel grows tall feathery foliage valued for its leaves and seeds. Both types require similar growing conditions and benefit from early indoor sowing. Florence fennel typically matures in 80 to 100 days, making timing crucial for successful bulb development.
Comparing growth requirements
| Characteristic | Celery | Fennel |
|---|---|---|
| Days to maturity | 130-140 days | 80-100 days |
| Temperature preference | 60-70°F | 60-65°F |
| Germination time | 14-21 days | 7-14 days |
| Transplant readiness | 8-10 weeks | 6-8 weeks |
Both vegetables share a preference for cool weather conditions and demonstrate sensitivity to extreme temperatures. Understanding these fundamental characteristics helps gardeners prepare appropriate growing environments and anticipate potential challenges throughout the cultivation process.
Choosing the right time to start seedlings indoors
Calculating backward from last frost date
Determining the optimal starting time requires working backward from your region’s average last frost date. For celery, count back 10 to 12 weeks from this date to establish your seed-starting window. Fennel needs a slightly shorter indoor period of 6 to 8 weeks before transplanting. March typically provides the ideal timeframe for most temperate zones, though gardeners in warmer regions may start earlier while those in colder climates might delay until late March or early April.
Regional considerations for timing
Geographic location significantly influences starting schedules:
- Northern zones (USDA 3-5): start seeds in mid to late March
- Transitional zones (USDA 6-7): begin sowing in early March
- Southern zones (USDA 8-10): initiate indoor sowing in late February or early March
- Coastal regions: adjust timing based on microclimates and fog patterns
Why March matters for these crops
March represents the sweet spot for starting celery and fennel indoors because it aligns seedling maturity with optimal outdoor transplanting conditions. Starting too early results in leggy, overgrown seedlings that struggle after transplanting, while delayed sowing leaves insufficient time for crops to mature before summer heat triggers bolting. The March timeframe ensures seedlings develop strong root systems and sturdy stems while indoor conditions remain controllable.
With timing established, attention must shift to proper seed preparation techniques that maximize germination success rates.
Preparing celery and fennel seeds
Understanding seed characteristics
Both celery and fennel produce tiny seeds that present unique germination challenges. Celery seeds rank among the smallest vegetable seeds, with approximately 70,000 seeds per ounce. These seeds contain natural germination inhibitors that evolved to prevent premature sprouting. Fennel seeds, while slightly larger, share similar characteristics requiring specific preparation methods for optimal results.
Pre-soaking techniques
Soaking seeds before planting significantly improves germination rates and speed. For celery, soak seeds in room-temperature water for 24 hours before sowing. This process leaches out germination inhibitors and softens the seed coat. Fennel seeds benefit from a shorter 12-hour soak. After soaking, drain seeds thoroughly and spread them on paper towels to remove excess moisture, making them easier to handle during planting.
Selecting quality starting medium
The growing medium plays a crucial role in seedling success. Choose a sterile seed-starting mix rather than garden soil to prevent disease issues. An ideal mix contains:
- Peat moss or coconut coir for moisture retention
- Perlite or vermiculite for drainage and aeration
- Fine texture that accommodates tiny seeds
- Neutral pH between 6.0 and 7.0
Sowing depth and spacing
Proper sowing depth ensures adequate soil contact without burying seeds too deeply. Press celery seeds lightly onto the soil surface and cover with just a thin dusting of starting mix, as they require light for germination. Fennel seeds tolerate slightly deeper planting at approximately 1/4 inch depth. Space seeds about 1 inch apart in flats or sow 2-3 seeds per cell in cell packs to allow for later thinning.
Once seeds are properly sown, creating the right environment for germination and early growth becomes the next priority.
Care and maintenance of seedlings indoors
Optimal temperature and light conditions
Temperature control significantly impacts germination success. Celery seeds germinate best at 70-75°F, while fennel prefers slightly cooler conditions around 65-70°F. Use heat mats beneath seed trays to maintain consistent soil temperature. Once seedlings emerge, reduce ambient temperature to 60-65°F to encourage stocky growth. Provide 14-16 hours of light daily using grow lights positioned 2-3 inches above seedling tops, raising lights as plants grow.
Watering strategies for young seedlings
Both crops demand consistent moisture without waterlogging. Water from below by placing trays in shallow water baths, allowing capillary action to moisten soil evenly. This method prevents disturbing tiny seeds and reduces damping-off disease risk. Keep soil consistently moist but never soggy. As seedlings mature, transition to careful top watering with a gentle spray, always watering in the morning to allow foliage to dry before nightfall.
Thinning and transplanting to larger containers
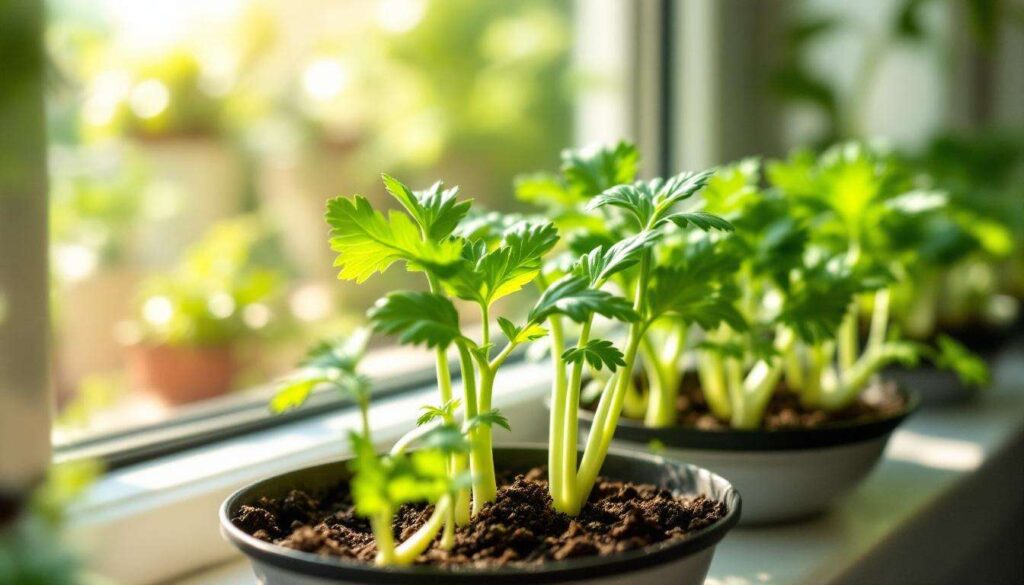
When seedlings develop their first true leaves (the second set of leaves), thin to the strongest plant per cell or space seedlings 2 inches apart in flats. Celery seedlings particularly benefit from transplanting into individual 3-4 inch pots when they reach 2-3 inches tall. This step encourages robust root development. Handle seedlings by their leaves rather than stems to avoid damage, and water thoroughly after transplanting to settle soil around roots.
Fertilization requirements
Begin feeding seedlings when true leaves appear. Use a diluted liquid fertilizer at quarter strength weekly, gradually increasing to half strength as plants mature:
- Balanced formula (10-10-10 or similar) for overall growth
- Liquid fish emulsion for organic options
- Kelp extract to promote strong root systems
- Avoid over-fertilizing, which produces weak, leggy growth
Hardening off process
Begin hardening off seedlings 7-10 days before transplanting outdoors. Gradually expose plants to outdoor conditions by placing them in a sheltered location for increasing periods daily. Start with 1-2 hours of filtered sunlight, progressively extending exposure time and intensity. Protect seedlings from strong winds and direct afternoon sun initially. This acclimation process prevents transplant shock and prepares plants for permanent outdoor placement.
As seedlings mature and outdoor conditions stabilize, the focus shifts to successful transplanting techniques.
Transplanting outdoors after the last frost
Confirming frost-free conditions
Wait until all danger of frost has passed and soil temperature reaches at least 50°F before transplanting. Both celery and fennel suffer damage from freezing temperatures, and cold soil slows root establishment. Monitor local weather forecasts closely and have row covers or cloches ready for unexpected cold snaps. Soil temperature proves more critical than air temperature for successful establishment.
Site selection and soil preparation
Choose a location receiving full sun to partial shade with rich, well-draining soil. Both crops thrive in soil amended with generous amounts of compost or aged manure. Prepare beds by incorporating:
- 2-3 inches of compost worked into the top 8 inches of soil
- Balanced granular fertilizer according to soil test recommendations
- Additional organic matter for moisture retention
- Adequate drainage to prevent waterlogged conditions
Proper spacing guidelines
| Crop | Plant spacing | Row spacing |
|---|---|---|
| Celery | 8-10 inches | 24-30 inches |
| Florence fennel | 10-12 inches | 18-24 inches |
| Herb fennel | 12-18 inches | 24-36 inches |
Transplanting technique
Water seedlings thoroughly several hours before transplanting. Dig holes slightly larger than root balls and plant at the same depth seedlings grew indoors. For celery, some gardeners plant slightly deeper to encourage blanching. Firm soil gently around roots, eliminating air pockets. Water immediately after planting with a diluted transplant solution to reduce shock. Apply mulch around plants to conserve moisture and regulate soil temperature.
Successful transplanting sets the stage for ongoing care practices that ensure productive harvests.
Tips for a bountiful and successful harvest
Maintaining consistent moisture
Both crops demand steady, abundant water throughout the growing season. Celery particularly requires consistent moisture to prevent stalks from becoming tough and stringy. Provide 1-2 inches of water weekly through rainfall or irrigation. Drip irrigation or soaker hoses deliver water efficiently while keeping foliage dry. Mulching with 2-3 inches of organic material conserves moisture and moderates soil temperature fluctuations.
Fertilization during growth
These heavy feeders benefit from regular fertilization throughout the season:
- Side-dress with compost or balanced fertilizer every 3-4 weeks
- Apply liquid fertilizer bi-weekly for container-grown plants
- Use higher nitrogen formulas to promote leafy growth
- Reduce fertilization as harvest approaches to improve flavor
Managing common pests and diseases
Monitor plants regularly for aphids, celery worms, and slugs. Hand-pick larger pests and use insecticidal soap for aphid infestations. Prevent fungal diseases by ensuring adequate air circulation and avoiding overhead watering. Crop rotation helps minimize soil-borne disease buildup. Remove any diseased plant material promptly to prevent spread.
Blanching celery for tenderness
Blanching celery stalks 2-3 weeks before harvest produces milder, more tender stalks. Wrap bunches with newspaper, cardboard collars, or specialized blanching tubes, leaving foliage exposed. This technique excludes light from developing stalks, reducing chlorophyll and bitterness.
Knowing when to harvest
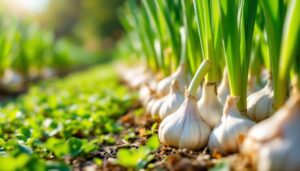
Harvest celery when stalks reach desired size, typically when outer stalks measure 8 inches or longer. Cut entire plants at soil level or harvest outer stalks individually. For fennel, harvest bulbs when they reach 3-4 inches in diameter, cutting just below the bulb. Both crops taste best harvested in cool morning hours and used fresh or stored in the refrigerator.
Starting celery and fennel seedlings indoors during March provides these slow-growing crops the extended season they need to mature properly. Careful attention to seed preparation, indoor care, and proper transplanting techniques establishes strong plants capable of producing abundant harvests. Consistent watering, regular fertilization, and attentive pest management throughout the growing season ensure these flavorful vegetables reach their full potential in the home garden.